Set language, text size, and management options in Settings
How to use the Settings screen: entry points to staff list management, offices, pre-check-in settings, and customer FAQ; switch the display language (Japanese/Korean/Traditional Chinese/English); change text size; change your password; and check for updates.
Video #011:06
Initial setup (admins)
The audio and subtitles of these videos are in Japanese. An English translation of the narration is available below.
Narration transcript (English translation)
Initial setup is all in “Settings” in the menu.
Register staff names in “Staff list”, and map links for your offices in “Office (map)”.
In “Pre-Check-in Settings”, choose what customers fill in beforehand; in “Airport meeting points”, set where you meet customers at the airport.
In “Rental certificate settings”, set the company details to print; in “Stripe Connection”, set the account used to pre-register cards.
“Customer FAQ” holds the questions and answers shown in the customer chat. Register them in Japanese and they're translated automatically.
“Language” and “Text size” change the display on this device.
In “User Management”, add the people who log in to the app. “Notifications” and “Change password” are here too.
Booking email reception isn't set up in the app. Add the receiving address you were given at sign-up as a recipient of booking notifications on each booking site. That's all.
Voice: ElevenLabs (AI-generated voice)
Contents
- Overview
- Open management options
- STEP 1: Reach each feature from "Management"
- Change display and text size
- STEP 2: Switch language and text size
- Account and app info
- STEP 3: Change password and check for updates
- FAQ
- Q. Where do I register staff names?
- Q. How is the office location used?
- Q. Does changing the language change my booking data?
- Related
Overview
The Settings screen brings together entry points to management options, the app's display settings (language and text size), your account, and app info. Open it from "Settings" in the drawer (left menu).
| Section | Content |
|---|---|
| Management | Staff list management, Offices (map), Pre-check-in settings, Customer FAQ |
| Language | Japanese / Korean / Traditional Chinese / English |
| Text size | Small / Large |
| Account | Change password |
| App info | Check for updates |
Open management options
STEP 1: Reach each feature from "Management"
The "Management" section at the top of Settings gathers the management options you use often.
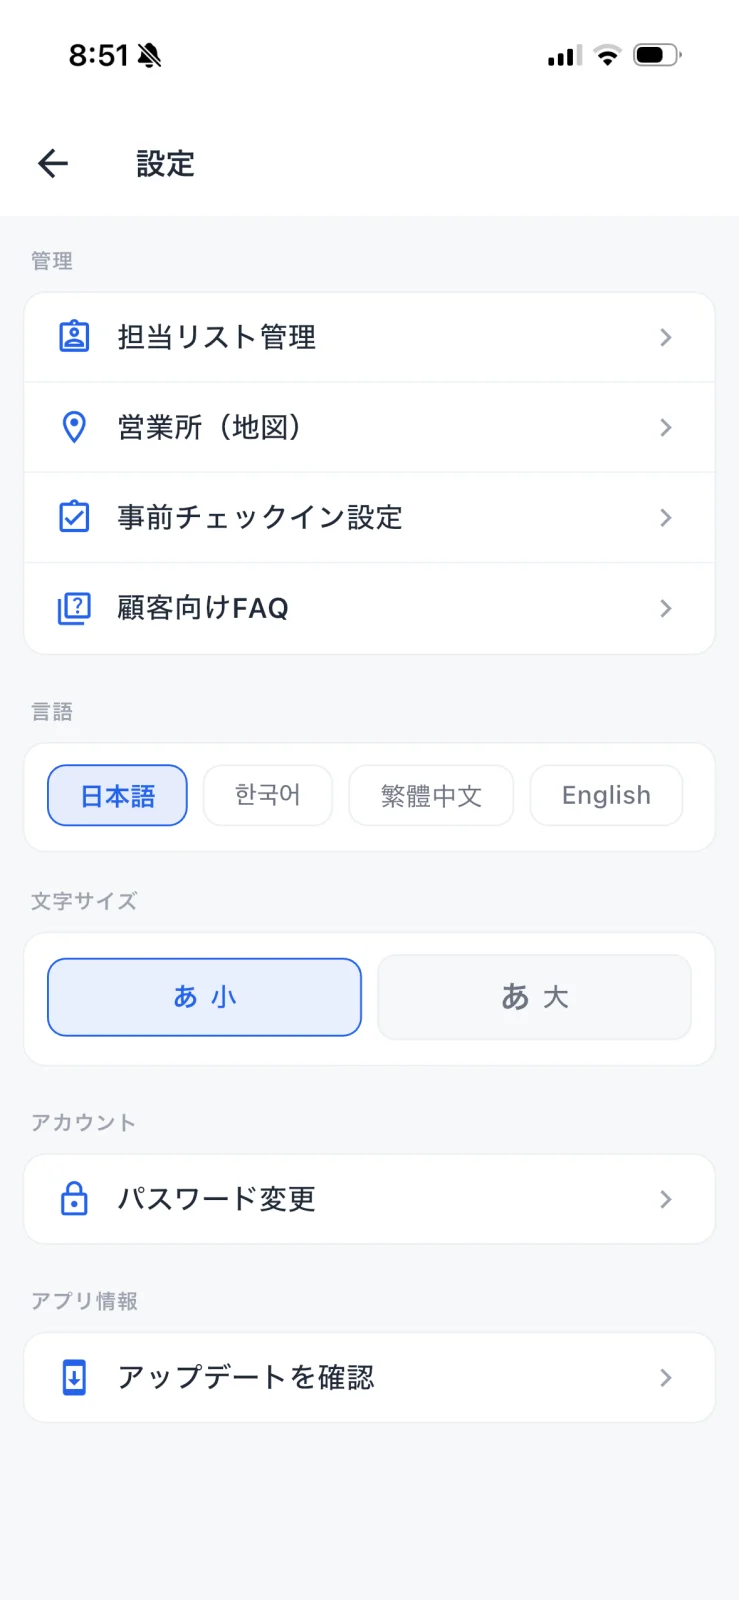
| Item | What it does |
|---|---|
| Staff list management | Register staff names to assign as pickup/return handlers |
| Offices (map) | Register office locations via a Google Maps link (shareable in chat) |
| Pre-check-in settings | Configure check-in items, forms, and auto-guidance (precheckin-settings) |
| Customer FAQ | Register a customer-facing FAQ (auto-translated in Translation Chat) |
Change display and text size
STEP 2: Switch language and text size
Under Language, choose the app's display language from Japanese / Korean / Traditional Chinese / English. Text size switches between Small / Large. Set it to whatever reads best for you.
Account and app info
STEP 3: Change password and check for updates
Change your login password from "Change password" under Account. Check whether a newer version is available from "Check for updates" under App info.
FAQ
Q. Where do I register staff names?
A. From Settings → "Staff list management." Registered names become candidates for the pickup/return handler.
Q. How is the office location used?
A. The office location you register via a Google Maps link can be shared with customers in Translation Chat.
Q. Does changing the language change my booking data?
A. No. The language setting only switches the app's display — your booking data itself is unchanged.
Related
- vehicles — Register vehicle information
- precheckin-settings — Configure pre-check-in (admin)
- users — Manage users (accounts) (admin)