Charge extra fees with a payment link
When a booking needs an extra payment (extension, fuel, etc.), create a payment link with a fixed amount and give it to the customer. Copy the link or send it to the chat. The customer pays by card or Apple Pay.
Contents
- Overview
- Before you start
- Create a payment link
- STEP 1: Open Payment links
- STEP 2: Tap "+ New"
- STEP 3: Choose the booking
- STEP 4: Set the purpose and amounts
- STEP 5: Choose how long it's valid and tap "Create link"
- STEP 6: Give it to the customer
- STEP 7: Check the payment
- What the customer sees
- FAQ
- Q. The link has expired
- Q. I entered the wrong amount
- Q. The customer paid but it still says "Awaiting payment"
- Q. What do "Pre" and "Post" mean?
- Related
Overview
When a booking needs an extra payment — extension, added options, fuel, cleaning and so on — you can charge it with a payment link. Enter the items and amounts, create the link, then copy it or send it to the chat. The customer opens the link and pays by card or Apple Pay. The money goes to your company's Stripe account.
Before you start
- Only admins can create payment links.
- Your company must have finished Stripe setup (「Stripe連携設定」 in the PC admin screen).
- The booking must have a translation chat that is still within its active period (reopen an expired chat first).
Create a payment link
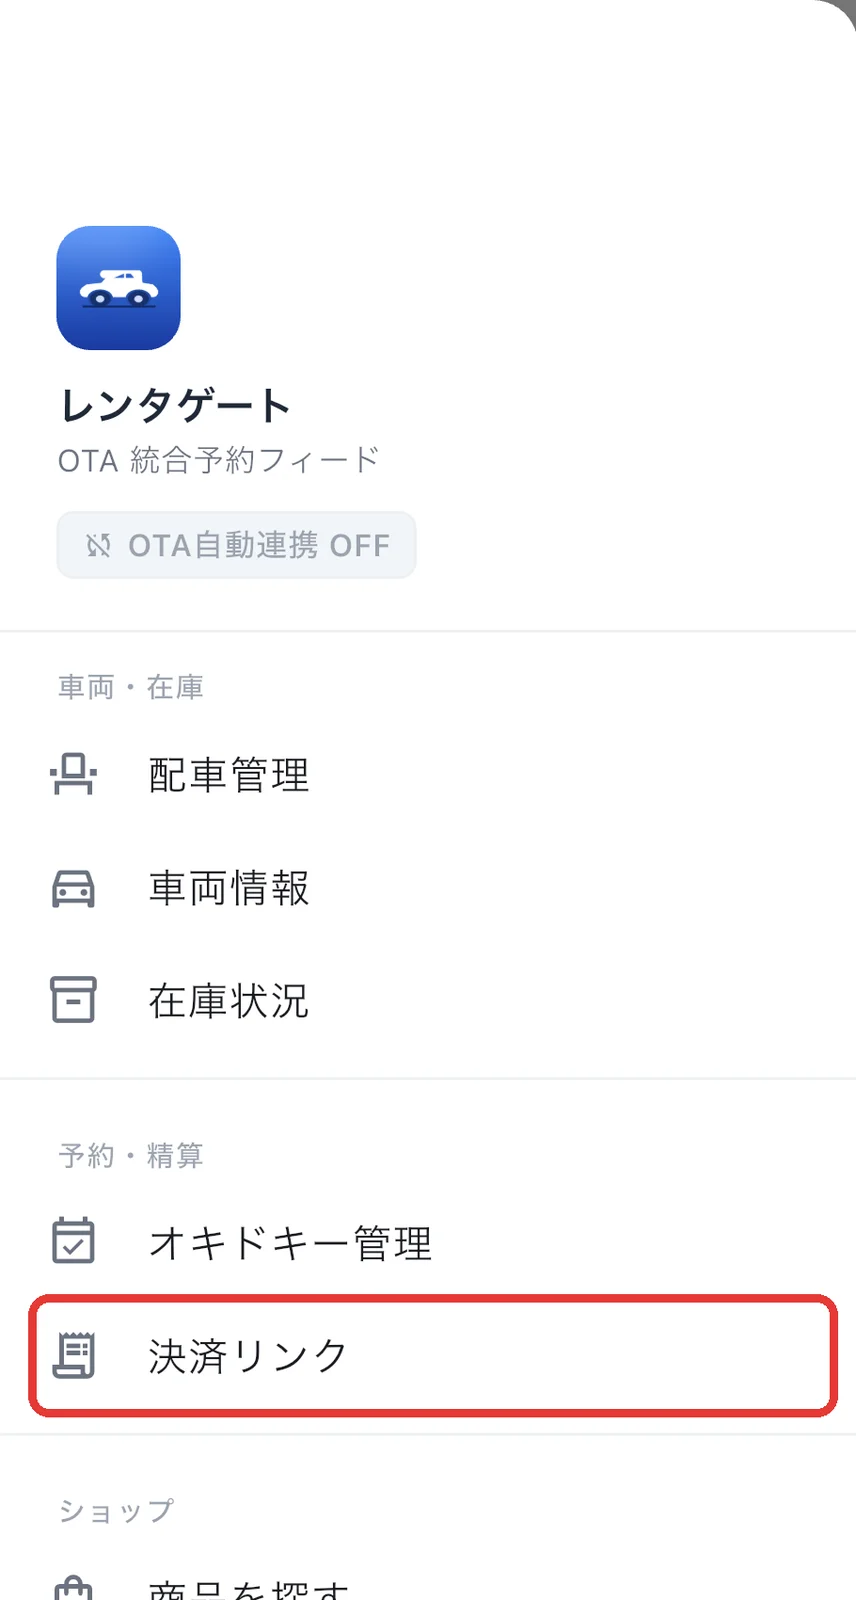
STEP 1: Open Payment links
Tap ≡ (menu) at the top left → Payment links under "Bookings & payments".
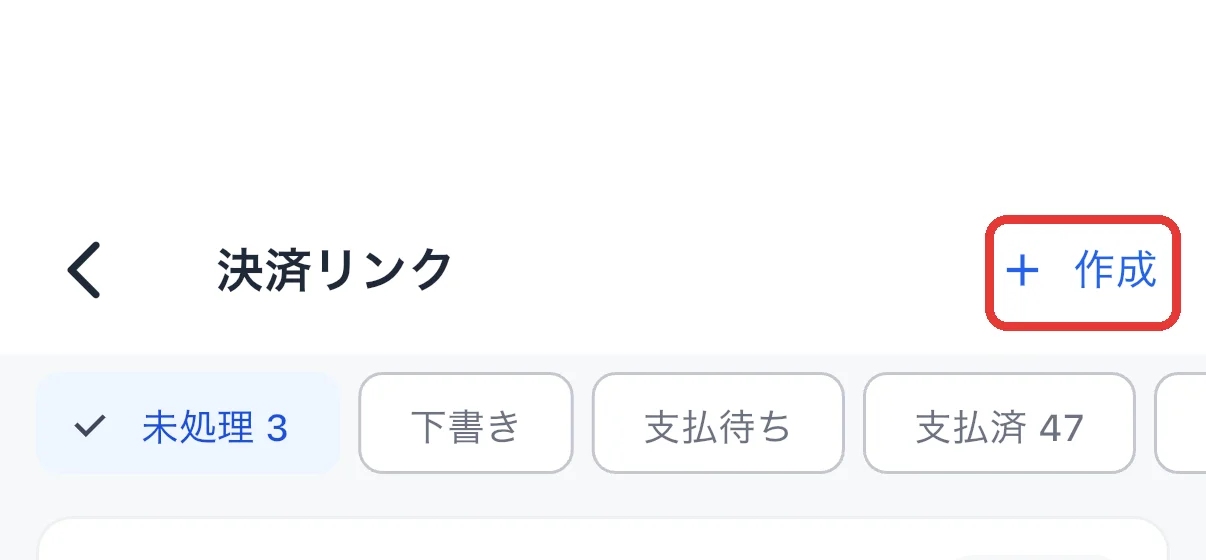
STEP 2: Tap "+ New"
Tap + New at the top right to open New payment link.
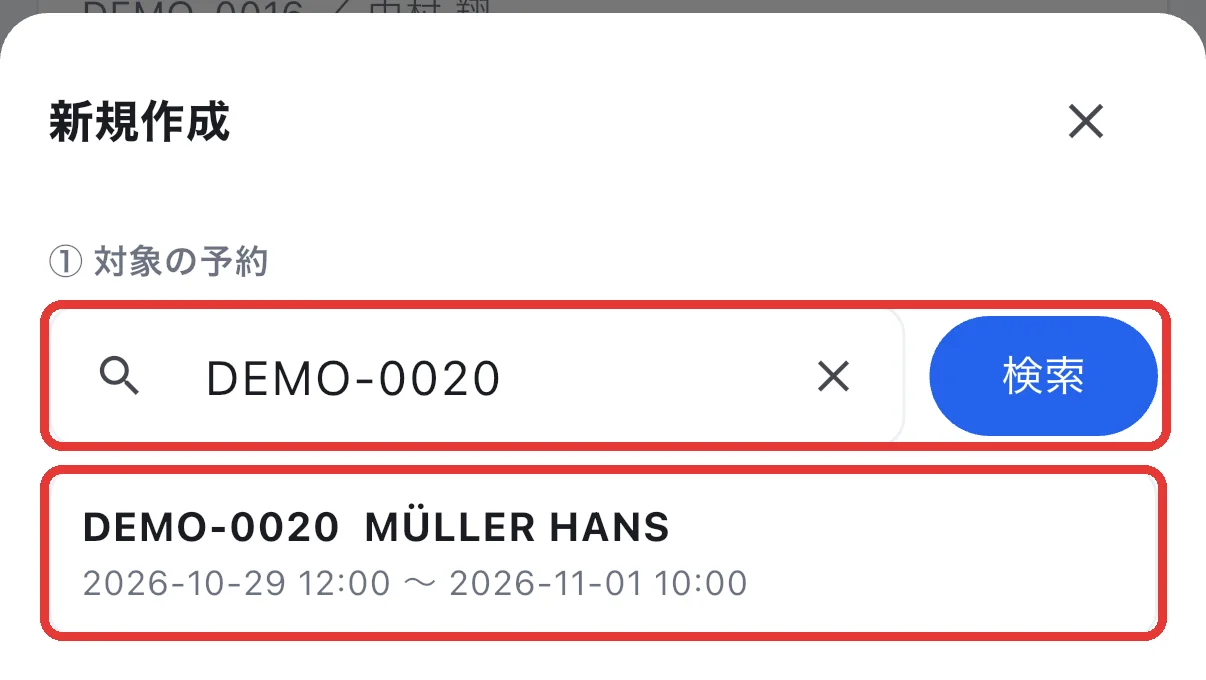
STEP 3: Choose the booking
In 1. Booking, enter the booking number or customer name, tap Search, then tap the booking.
STEP 4: Set the purpose and amounts
Choose Extra charge as the Purpose. In 2. Items, enter the amount (tax incl.) next to each item you want to charge. Only items with an amount are charged. For anything not in the list, use + Other (free input) at the bottom.
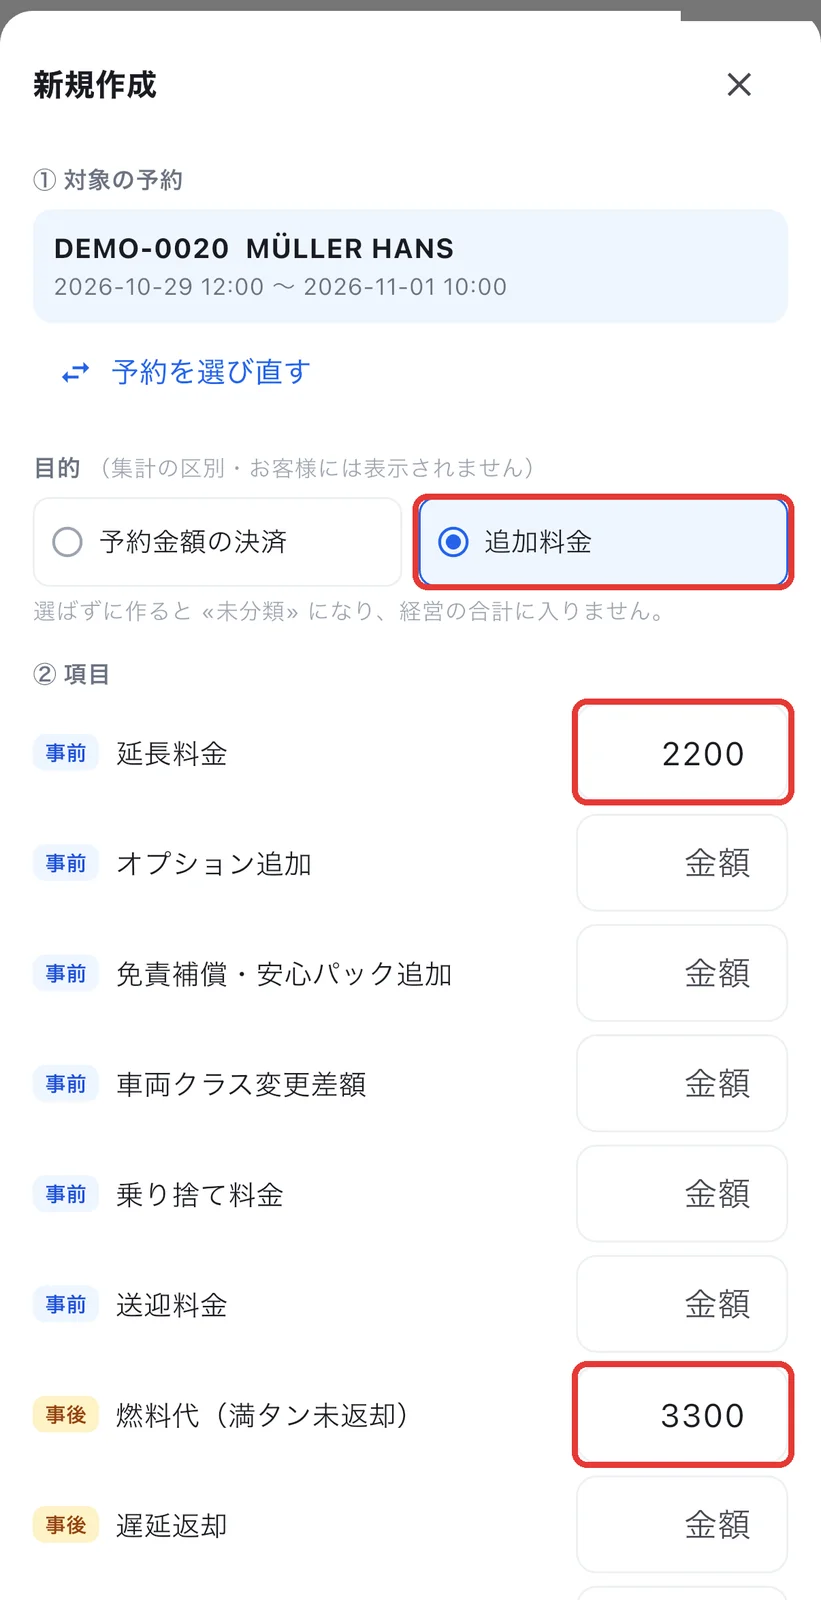
| Type | Main items |
|---|---|
| Pre | Extension, added options, added damage waiver, vehicle class change, one-way fee, pick-up fee |
| Post | Fuel, late return, flat tire repair, key lock-in, towing, cleaning, NOC, repairs, parking violation costs, etc. |
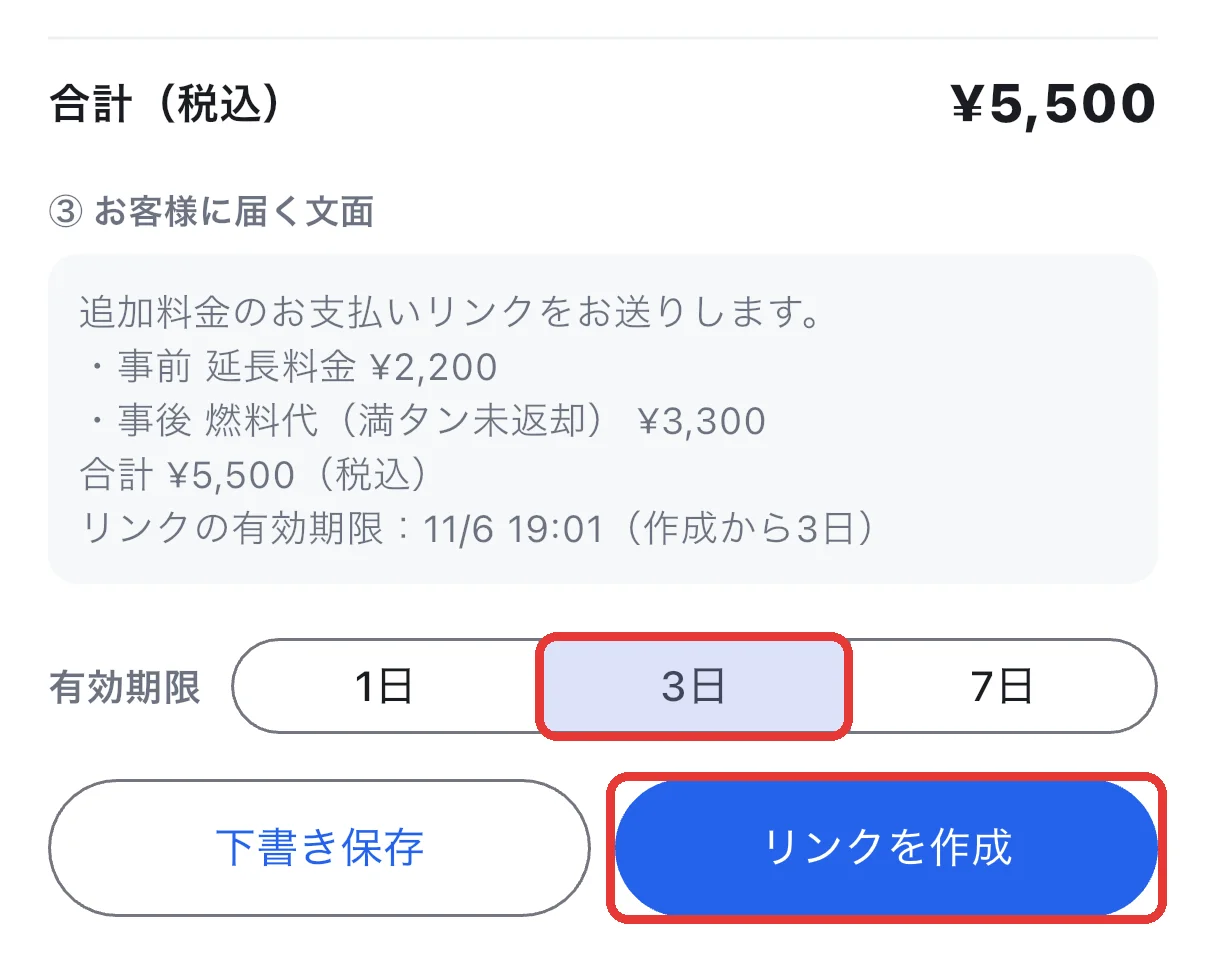
STEP 5: Choose how long it's valid and tap "Create link"
Check the Total (tax incl.) and 3. Message the guest receives, choose Valid for (1, 3 or 7 days), then tap Create link.
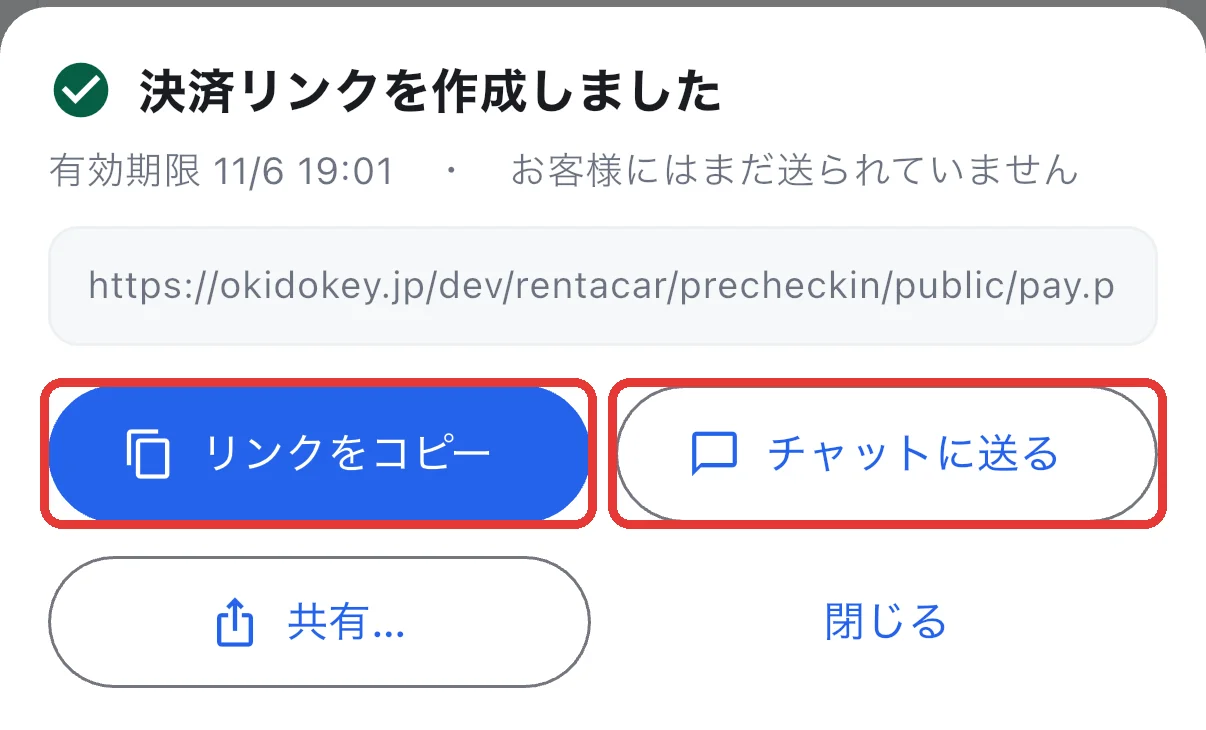
STEP 6: Give it to the customer
Choose Copy link (paste into LINE, email, etc.) or Send to chat. You can also use Share… to send it from another app.
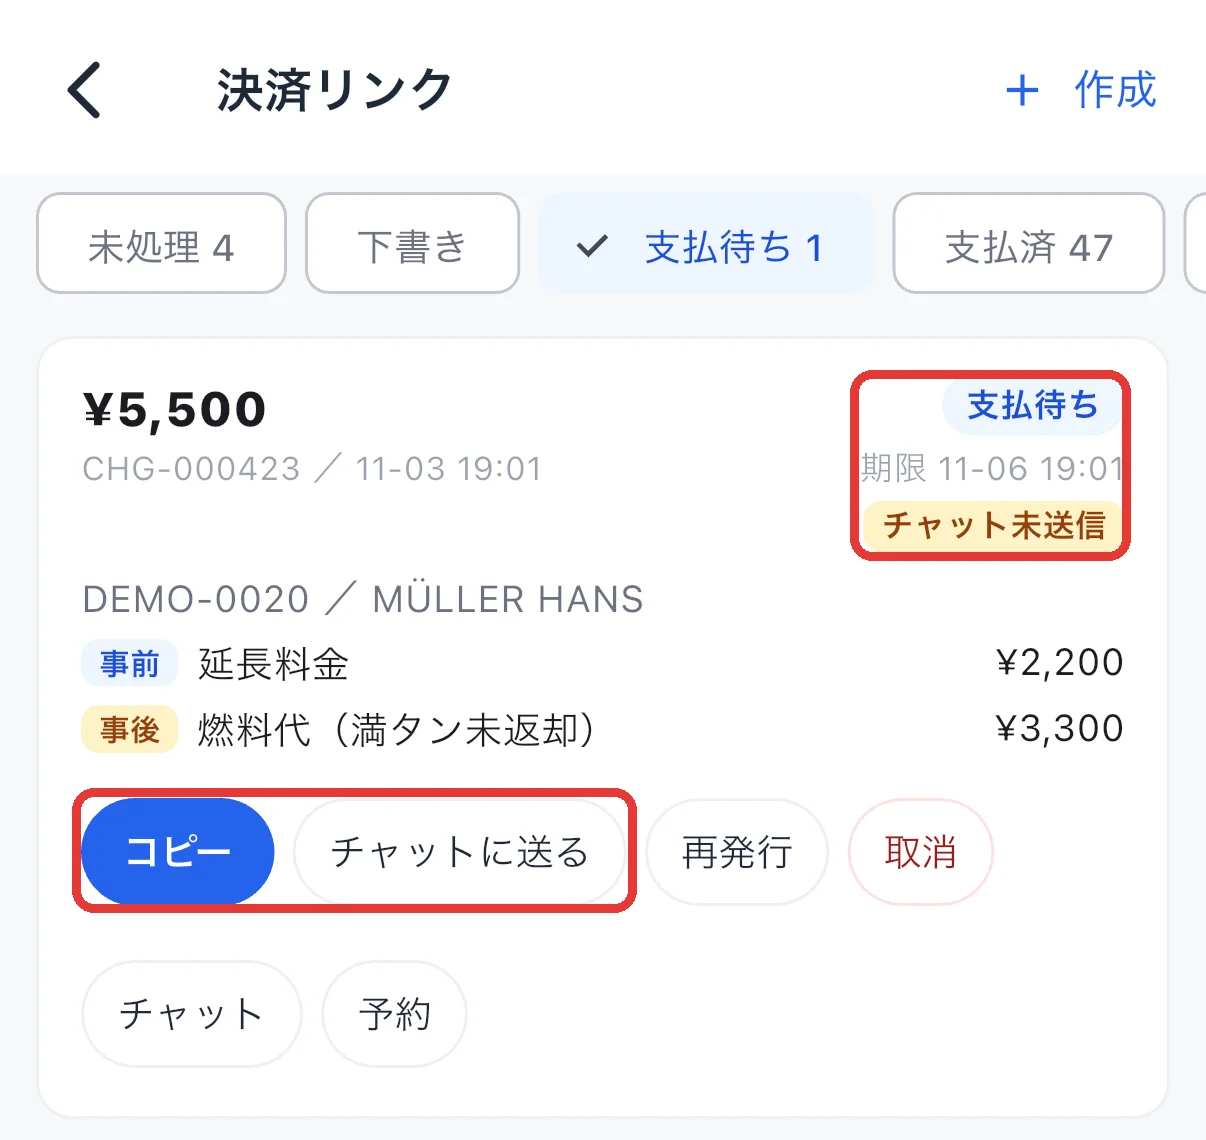
STEP 7: Check the payment
The status in the list becomes Awaiting payment, then Paid once the customer pays. Links you haven't sent yet show Not sent to chat; you can still Copy or Send to chat later.
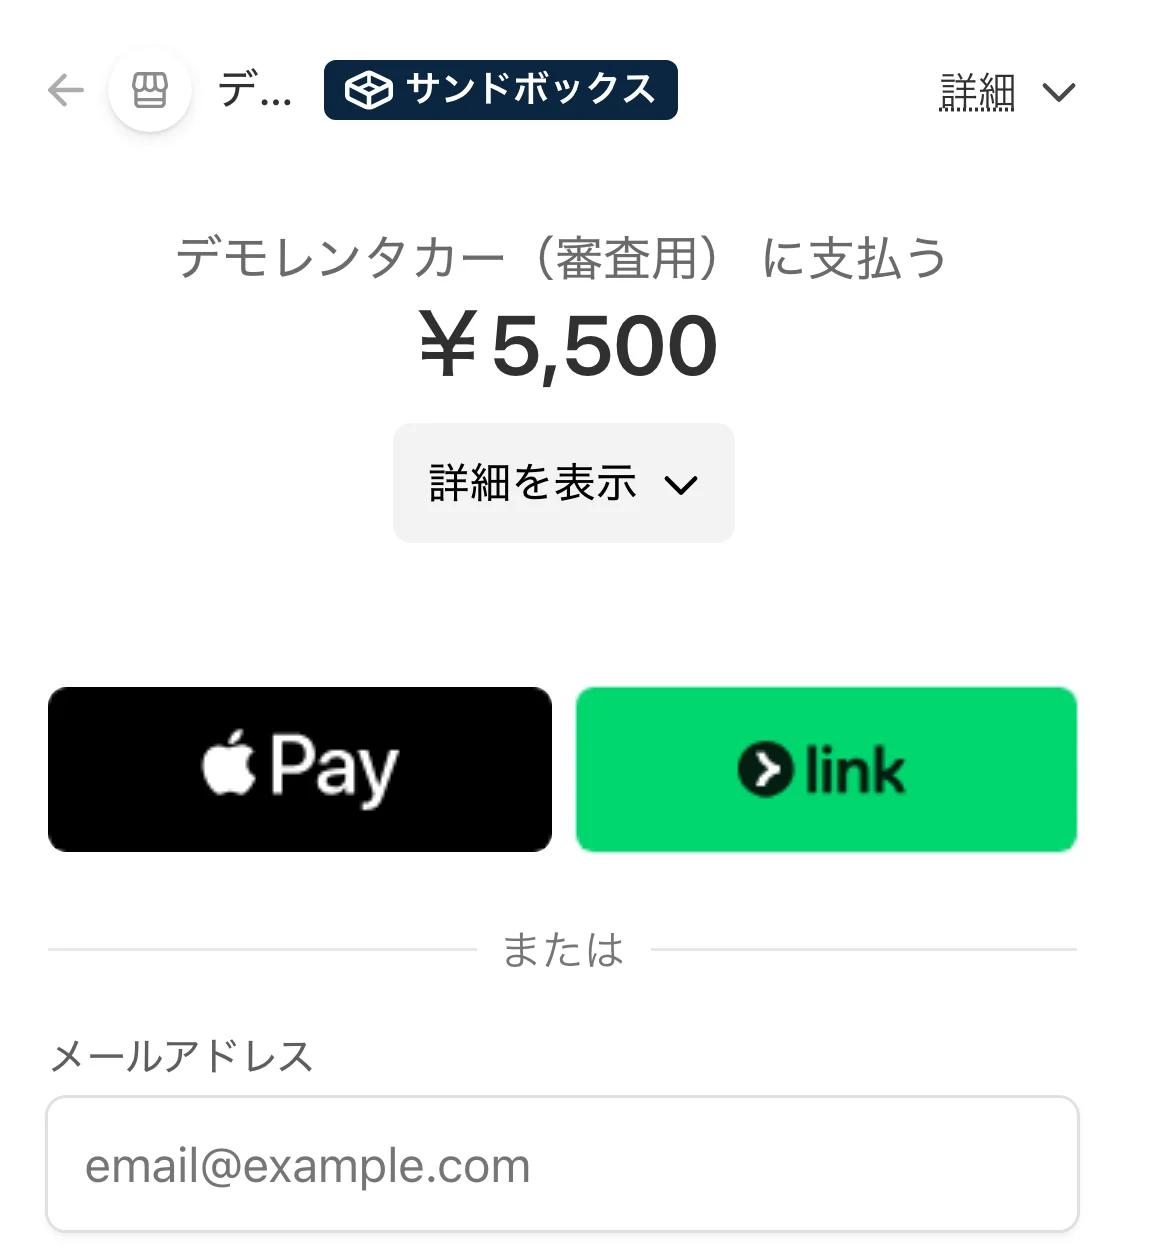
What the customer sees
The link opens Stripe's payment screen, where the customer pays by card or Apple Pay. After payment, a completion notice and a receipt link arrive in the chat.
FAQ
Q. The link has expired
A. Tap Reissue in the list. The URL stays the same and the validity is reset to the chosen number of days from now.
Q. I entered the wrong amount
A. Use Cancel link in the list and create a new one. If you haven't sent it to the chat, the customer sees nothing.
Q. The customer paid but it still says "Awaiting payment"
A. Reopen the list to refresh it to the latest status.
Q. What do "Pre" and "Post" mean?
A. Pre covers changes to the booking such as extensions or added options. Post covers costs after return such as fuel, cleaning or NOC.
Related
- booking-detail — View and edit booking details
- chat — Talk with customers in the translation chat