Register phone and walk-in bookings manually
How to manually add bookings that don't come through an OTA (phone, walk-in, etc.). Enter customer info, the rental/return dates and locations, and the vehicle. They're managed in the same feed as auto-imported bookings.
Video #100:59
Adding phone and walk-in bookings
The audio and subtitles of these videos are in Japanese. An English translation of the narration is available below.
Narration transcript (English translation)
Phone and walk-in bookings are added from the plus button at the bottom right of the Operations or Bookings tab.
The only required field is the customer name. Fill in the phone number and number of people as far as you know them.
Tap the pick-up and return date/time to choose the date and time together. Then tap “Confirm”.
The return date/time must be after the pick-up date/time. Enter the pick-up and return places here as well.
Choose the vehicle from the list. You can also type a model freely or change the number of cars.
You can also record the total amount, booking status, arrival flight, and a staff memo. The booking status starts as “Confirmed”.
Finally, tap “Register” to save the booking; its booking details screen opens right away. That's how to add a booking manually.
Voice: ElevenLabs (AI-generated voice)
Contents
- Overview
- Before you start
- Add a booking manually
- STEP 1: Open the form from the + button
- STEP 2: Enter customer info
- STEP 3: Enter schedule, locations, and vehicle
- STEP 4: Tap "Register"
- FAQ
- Q. Which fields are required?
- Q. Can I tell manual bookings apart from auto-imported ones?
- Q. I want to cancel a booking I added
- Related
Overview
In addition to bookings auto-imported from OTAs like Rakuten and Jalan, you can manually add bookings that don't come through an OTA — phone, walk-in, and so on. Manually added bookings are managed in the same feed and operations board as auto-imported ones.
Before you start
- Having the customer name (required) and any known contact info and dates ready makes this smoother.
- You can edit later in booking-detail, so it's fine to register with just the minimum first.
Add a booking manually
STEP 1: Open the form from the + button
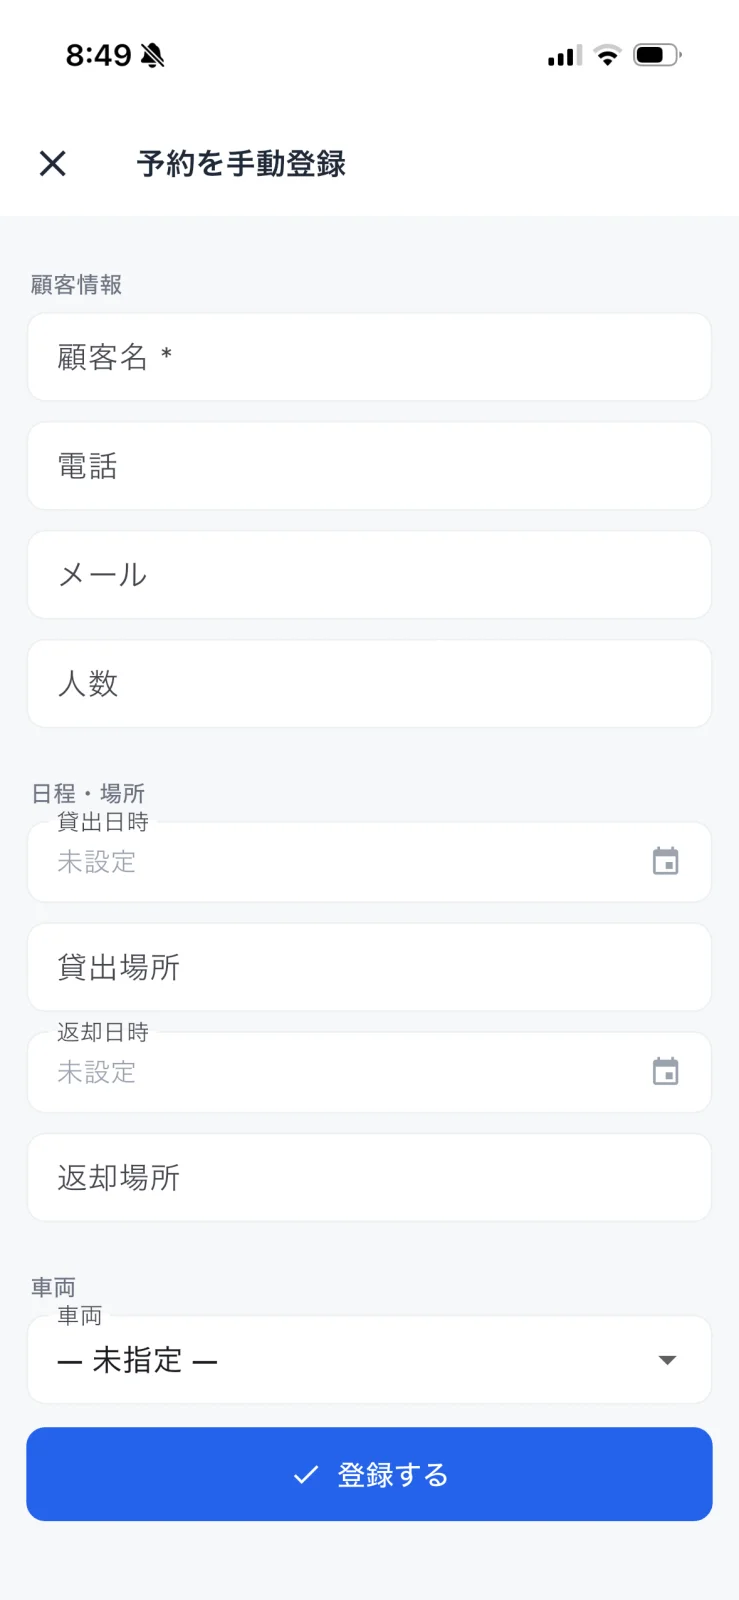
Tap the blue "+" button at the bottom right of the "Operations" or "Bookings" tab to open the "Add booking manually" screen.
STEP 2: Enter customer info
Fill in Customer info:
| Field | Required | Description |
|---|---|---|
| Customer name | Required | The booker's name |
| Phone | Optional | Contact phone number |
| Optional | Contact email address | |
| Party size | Optional | Number of people |
STEP 3: Enter schedule, locations, and vehicle
Under Schedule & location, set the rental date/time, rental location, return date/time, and return location. Pick dates from the calendar icon. Finally, choose the dispatch vehicle under Vehicle (you can leave it "unassigned" and assign it later).
STEP 4: Tap "Register"
When you're done, tap "Register" at the bottom. The booking is added to the feed and appears in the Operations tab and the Bookings tab (calendar and list views).
FAQ
Q. Which fields are required?
A. Only Customer name. Enter the others as known and add more later in booking-detail.
Q. Can I tell manual bookings apart from auto-imported ones?
A. Yes. The source on the booking card and detail shows "Manual (phone/on-site)" or similar.
Q. I want to cancel a booking I added
A. Open booking-detail to edit and handle it.
Related
- booking-detail — View and edit the details of a registered booking
- operation — Manage same-day pickups and returns
- ledger — Search all bookings